
GH5 with Leica 12-60mm at Shutterfest
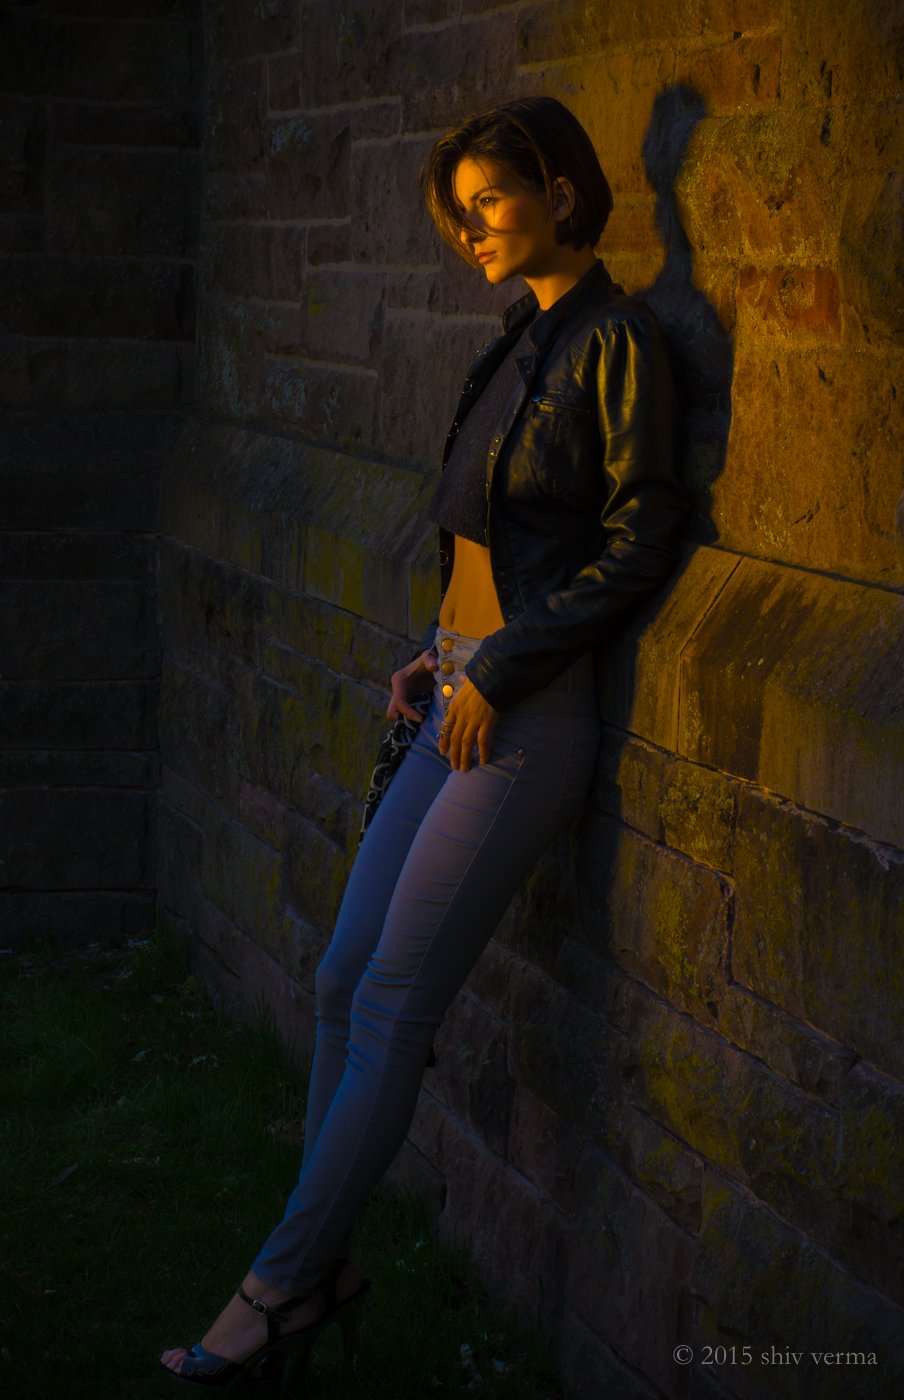
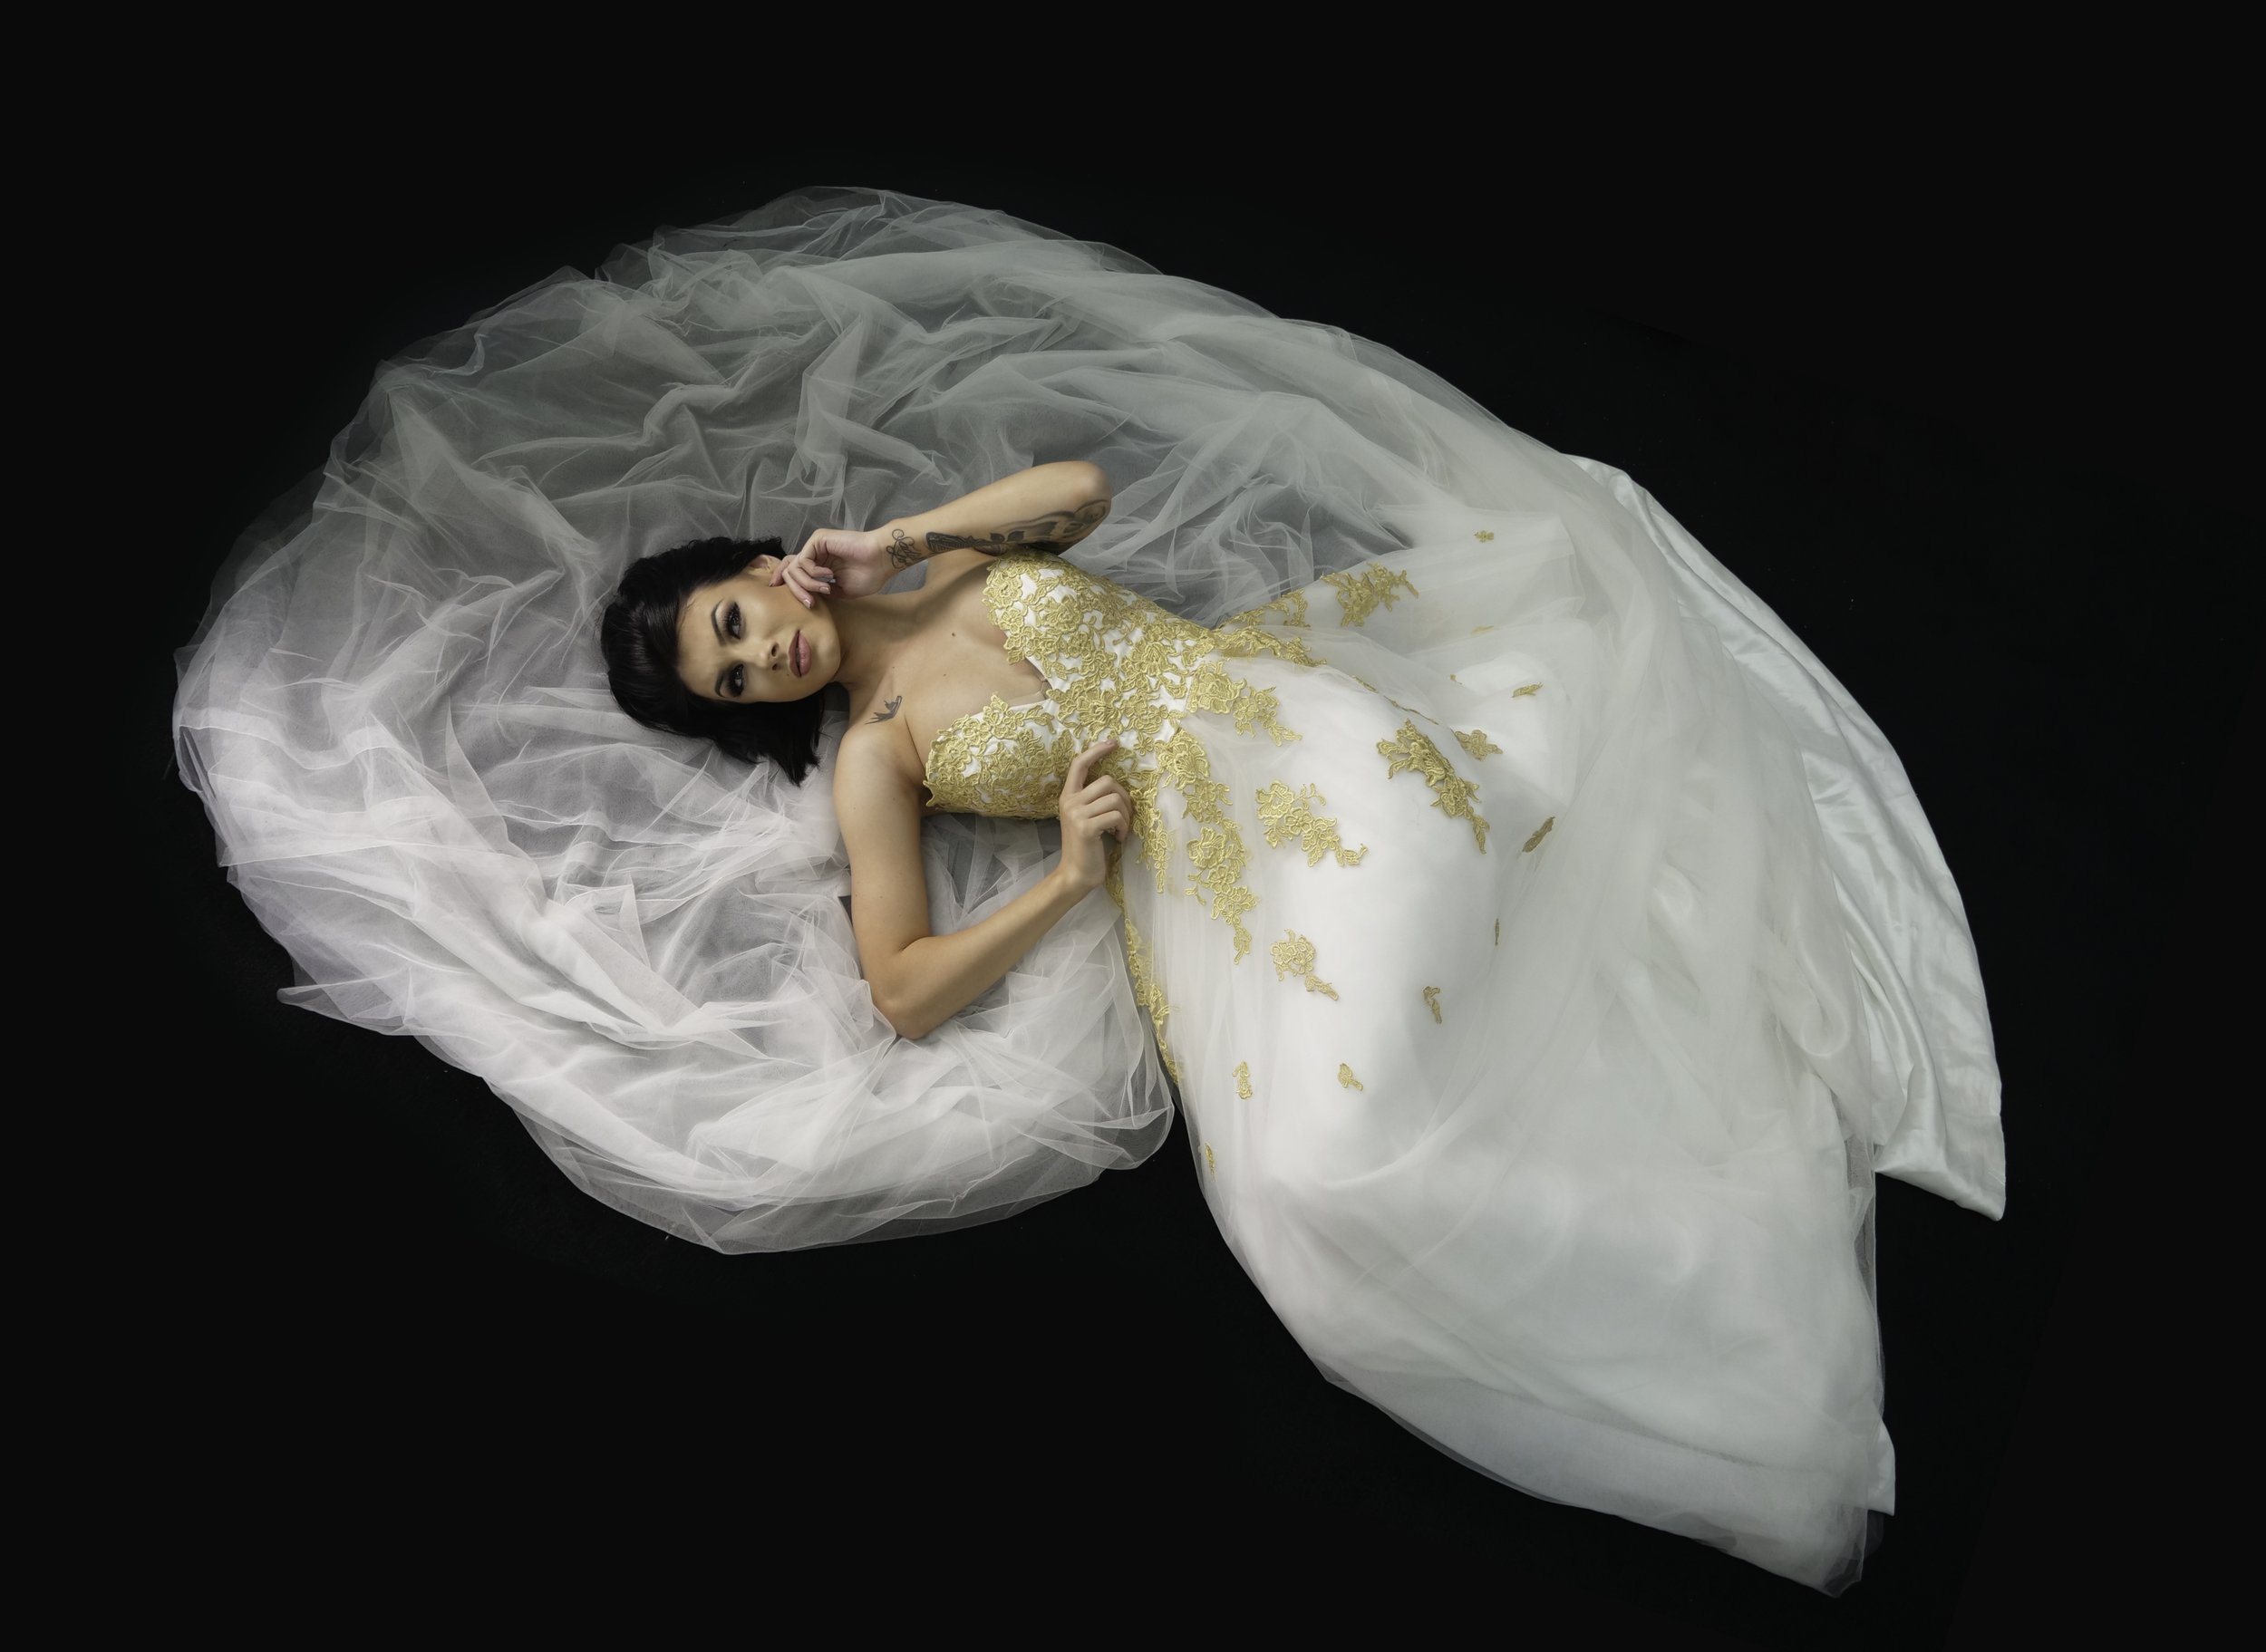 This was one of my very first images captured with the GH5 using the Leica 12 - 60 lens while the model was being prepped. The image is a jpg capture in sRGB. Click on the image to view it larger.
Lume Cube Review
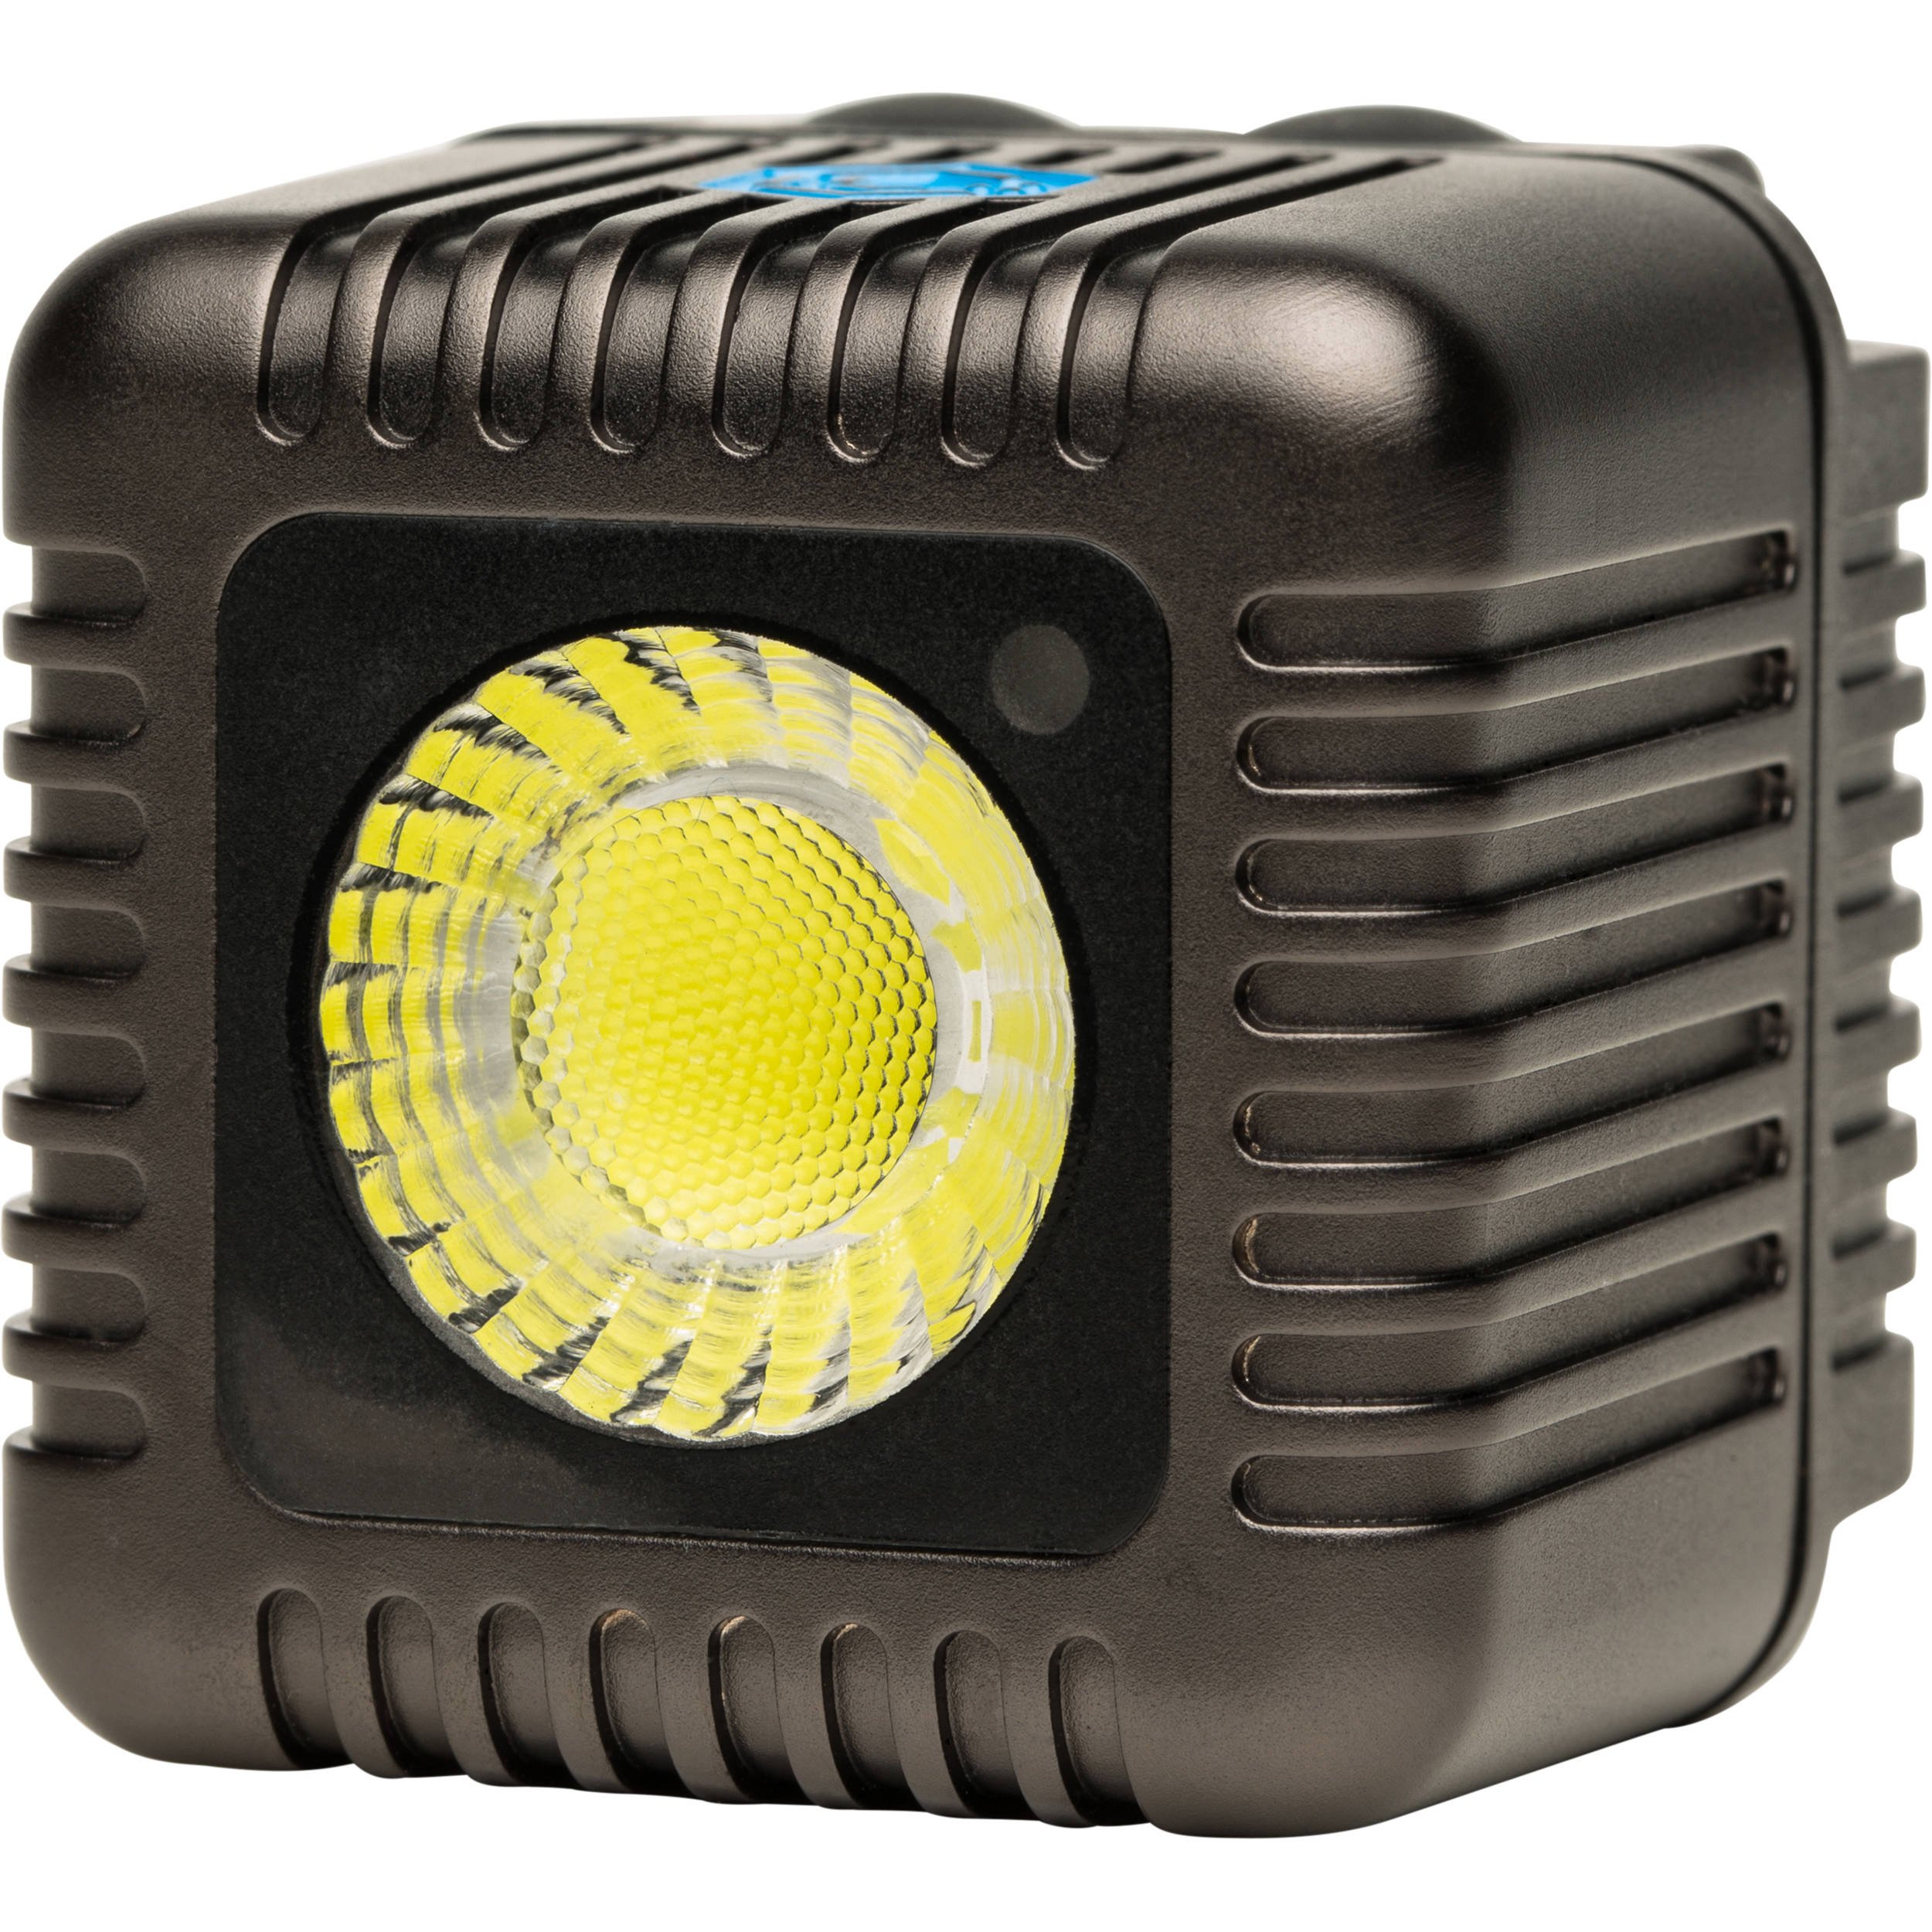 The makers of Lume Cube have a new smaller and less powerful but a highly efficient light designed for phone photography called the Life Lite. This is a smart, Bluetooth controlled, pocket-sized Lifestyle Light for iPhone, Android, DSLR or a GoPro. The Life Light will be available in March.This gadget review however, is of the original Lume Cube and the cheaper version that does not have any bluetooth connectivity. Both are identical in performance and while you can controll one with a smart phone the lite version is all manual. I have been using the Lume Cube for many months and have been most satisfied with its performance and portability. I have used these lights for macro, video and portraiture and love the results they have helped produce.Specs:
- Type LED
- Output Variable: 0 to 1500 Lumens
- Strobe: Variable 1/8000 to 1 second
- Mount Type: 1/4"-20 female
- Power Source: Integrated battery
- Battery Duration: 100% Brightness: 20 minutes; 90% Brightness: 60 minutes; 50% Brightness: 120 minutes
- Power Connector: USB (for charging)
- Waterproof Depth: 100' / 30.5 m
- Dimensions: 1.5 x 1.5 x 1.5"
CLICK HERE TO ORDERThe Lume Cube comes in a small cube shaped cardboard box that contains the Lume Cube and a USB charging cable.You do need to unscrew a small cover to access the charging port. This access cover is a requirement as the Lume Cube is rated to be waterproof to depth of 100 feet.Shaped as a cube, the unit has two rubberized push button switches on the top and a 1/4 20 mount that can be used to mount the light on a light stand, tripod or any flexible light mounting device.The two push buttons control the video light and the alternate flash function of the device. Each time you depress the on/off video switch the light cycles through 10 levels of intensity.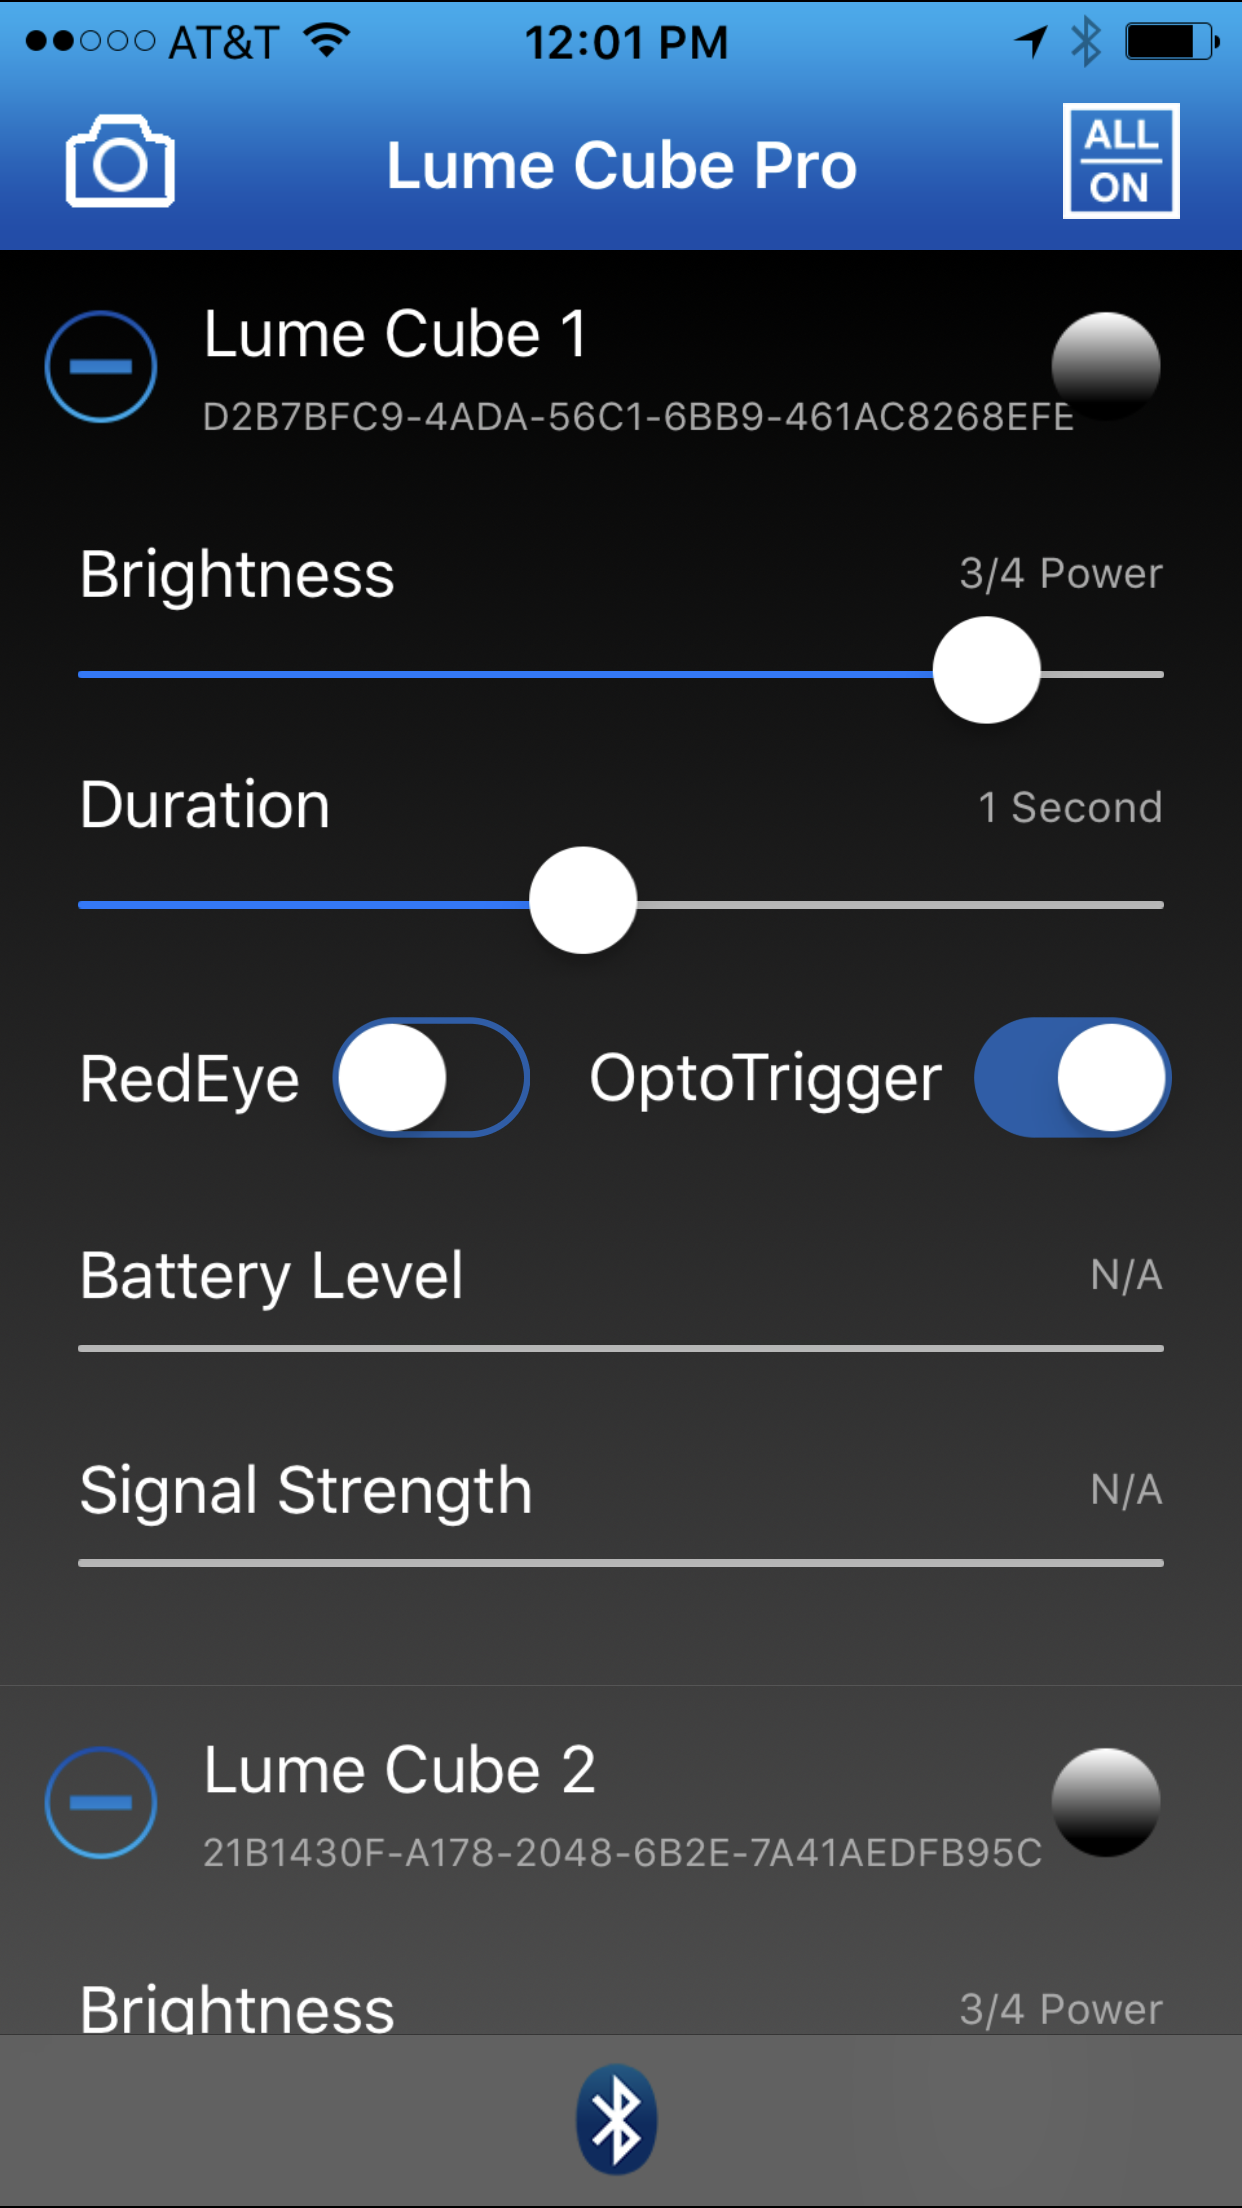 You can also control the Lume Cube using the mobile app. Lume Cube has simplified its lighting controls with a proprietary wireless, Bluetooth-enabled app, available on both Apple iOS and Android. The app is capable of controlling up to 5 Lume Cubes simultaneously. The app allows you to adjust the brightness, flash duration and red eye latency on each Lume Cube independently; and with its onboard optical sensor, Lume Cube can be configured as a slave flash unit to be fired by any other external flash.You have to register your Lume Cube to sync it to your app once registered you can control all your Lume Cube’s power and settings separately.Lume Cube Setup and test for portraitsTo test the Lume Cubes I fitted two Lume Cubes on two separate light stands. The “Main” Lume Cube was place so as to create Rembrandt lighting on the dummy head. The second was place to create a gentle fill. As you can see from the image below, the Lume Cube, due mainly to its size creates a fairly hard light. The settings were ISO 200, f/1.7 at 1/125 sec. using a Panasonic Lumix GX85 body and a Lumix 42.5mm f/1.7 lens wide open. The light emitted is cool and for this test I used an X-Rite Color Checker Passport to balance the temperature.
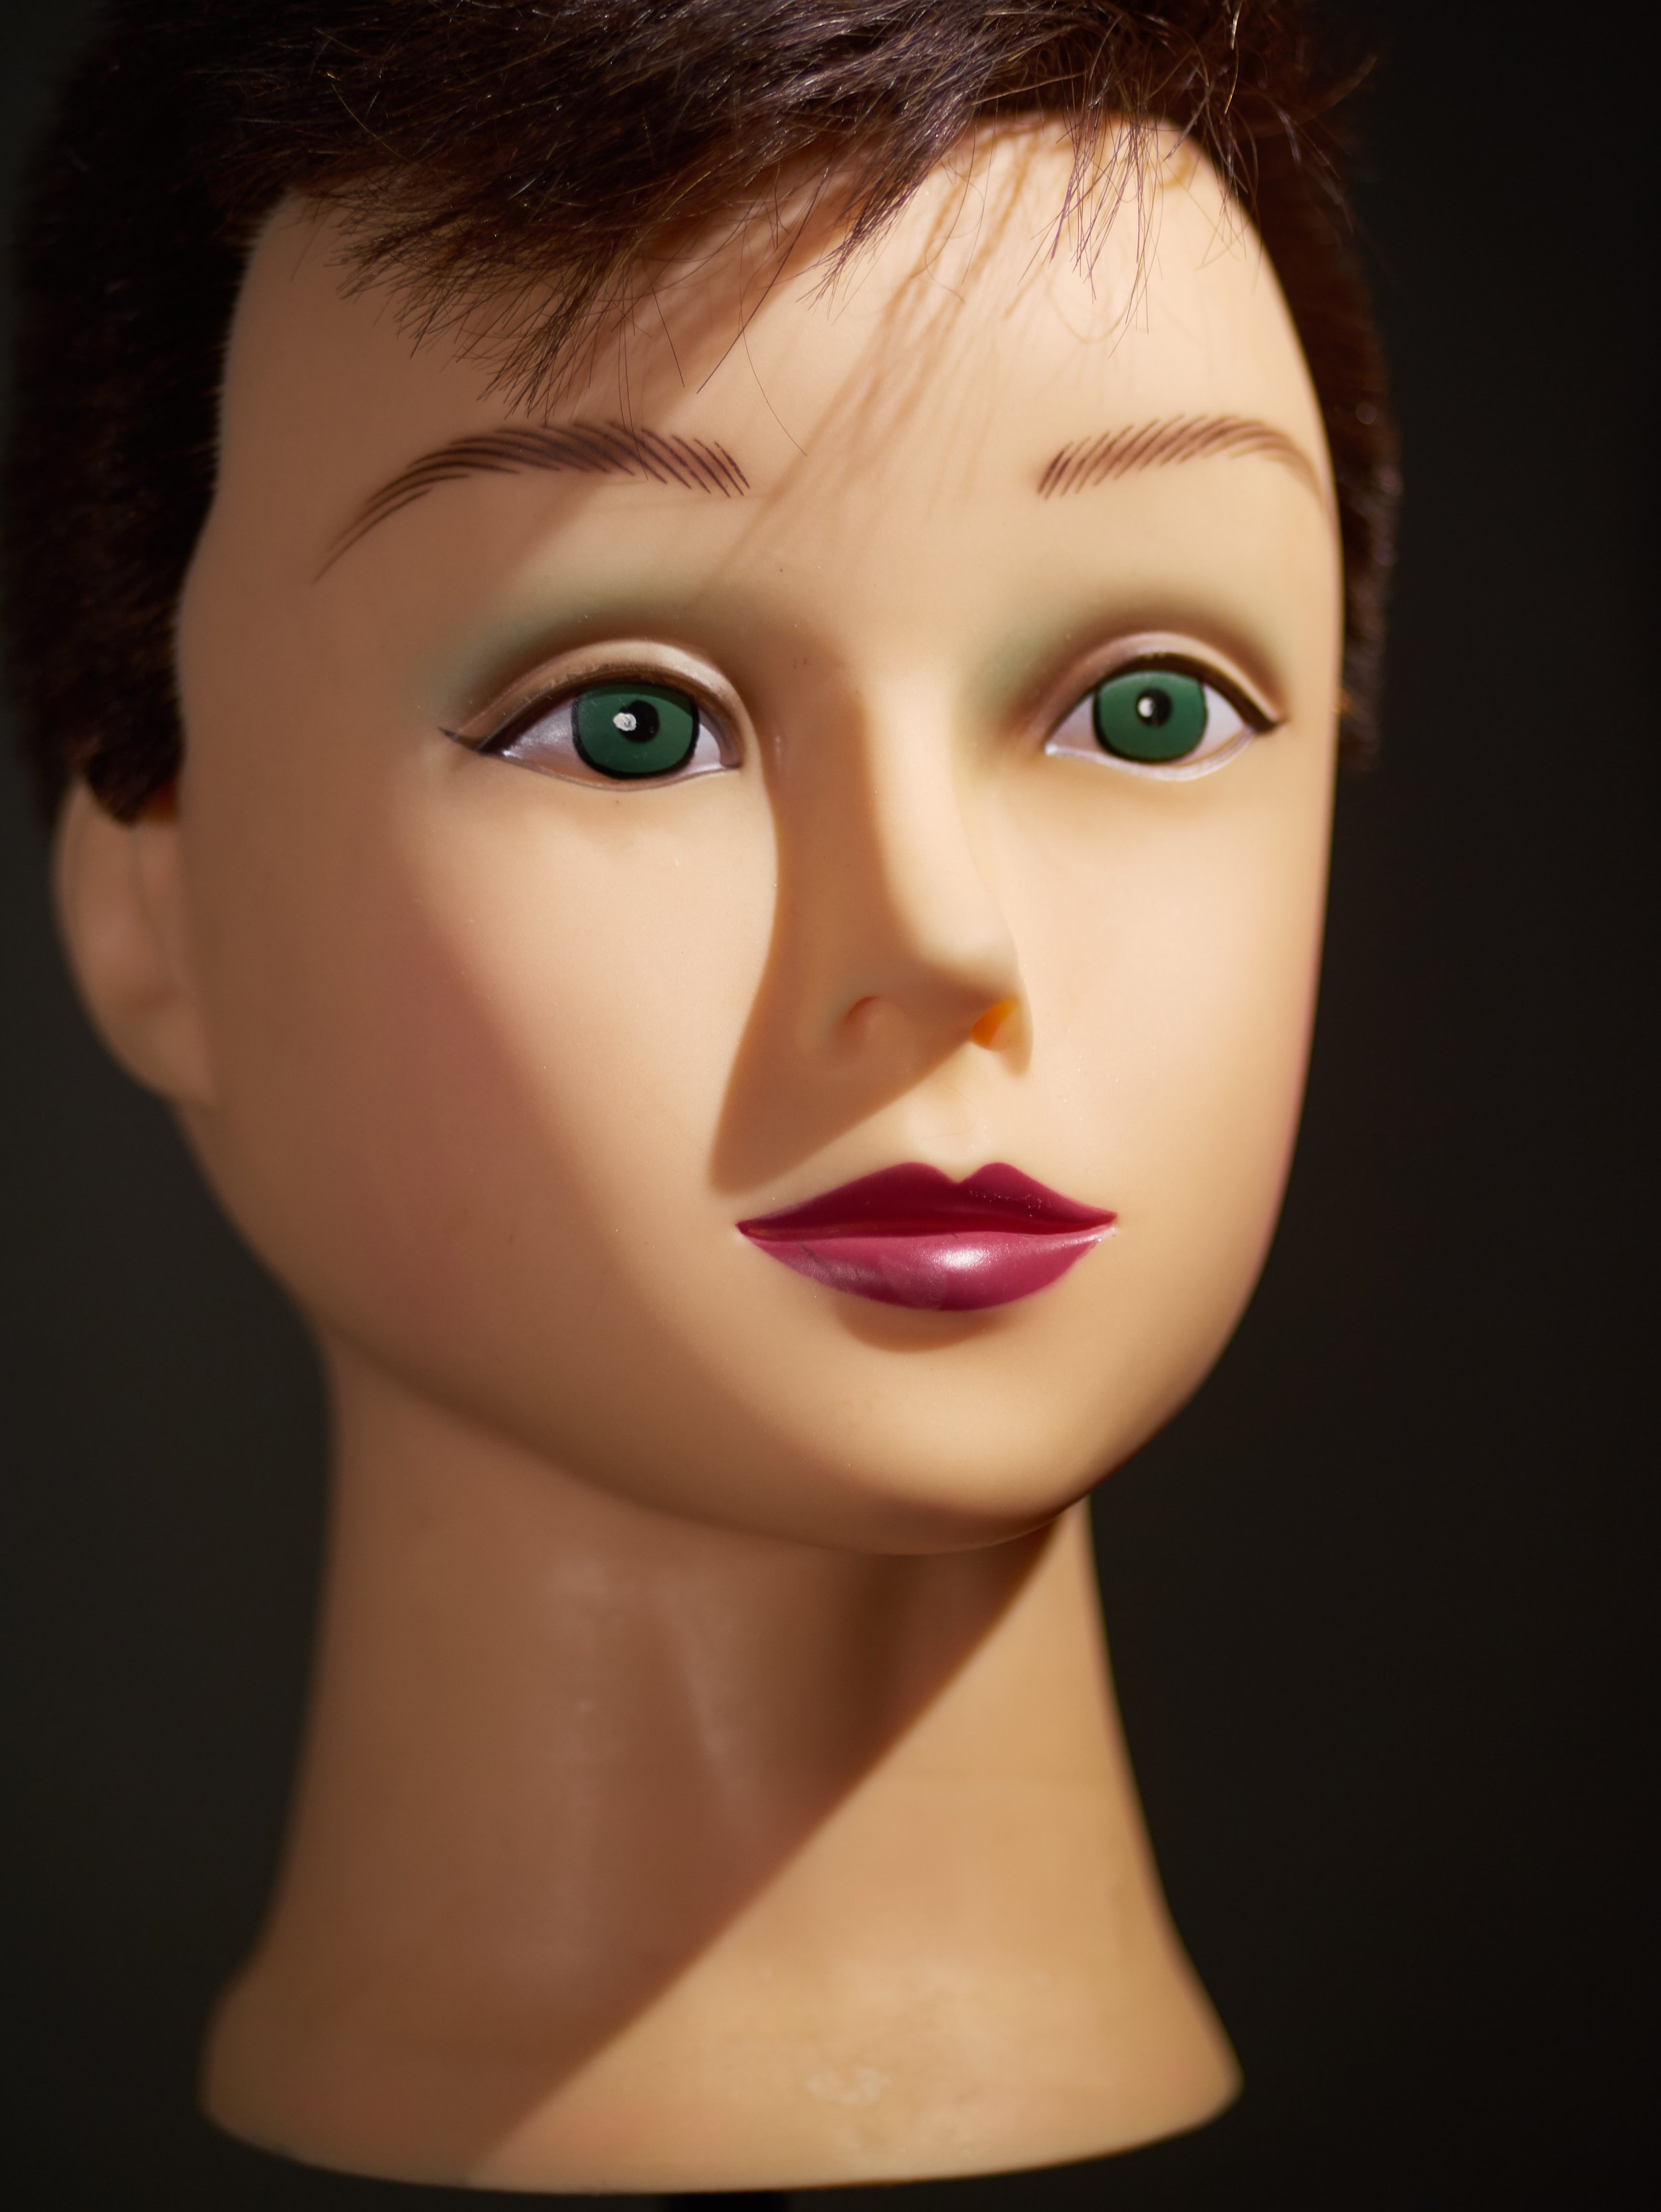 The second test was conducted with the same placement of the lights but instead of the Lume Cubes facing the dummy head directly the light was bounced off two Rogue Flash Benders. No Diffusion material was used.As you can see the light was much softer and way more pleasing in the image below. The settings were ISO 640, F/1.7 at 1/80 sec. Clearly there is about 3 stops of light loss when using the Flash Benders. However, the soft light is excellent for portraiture.
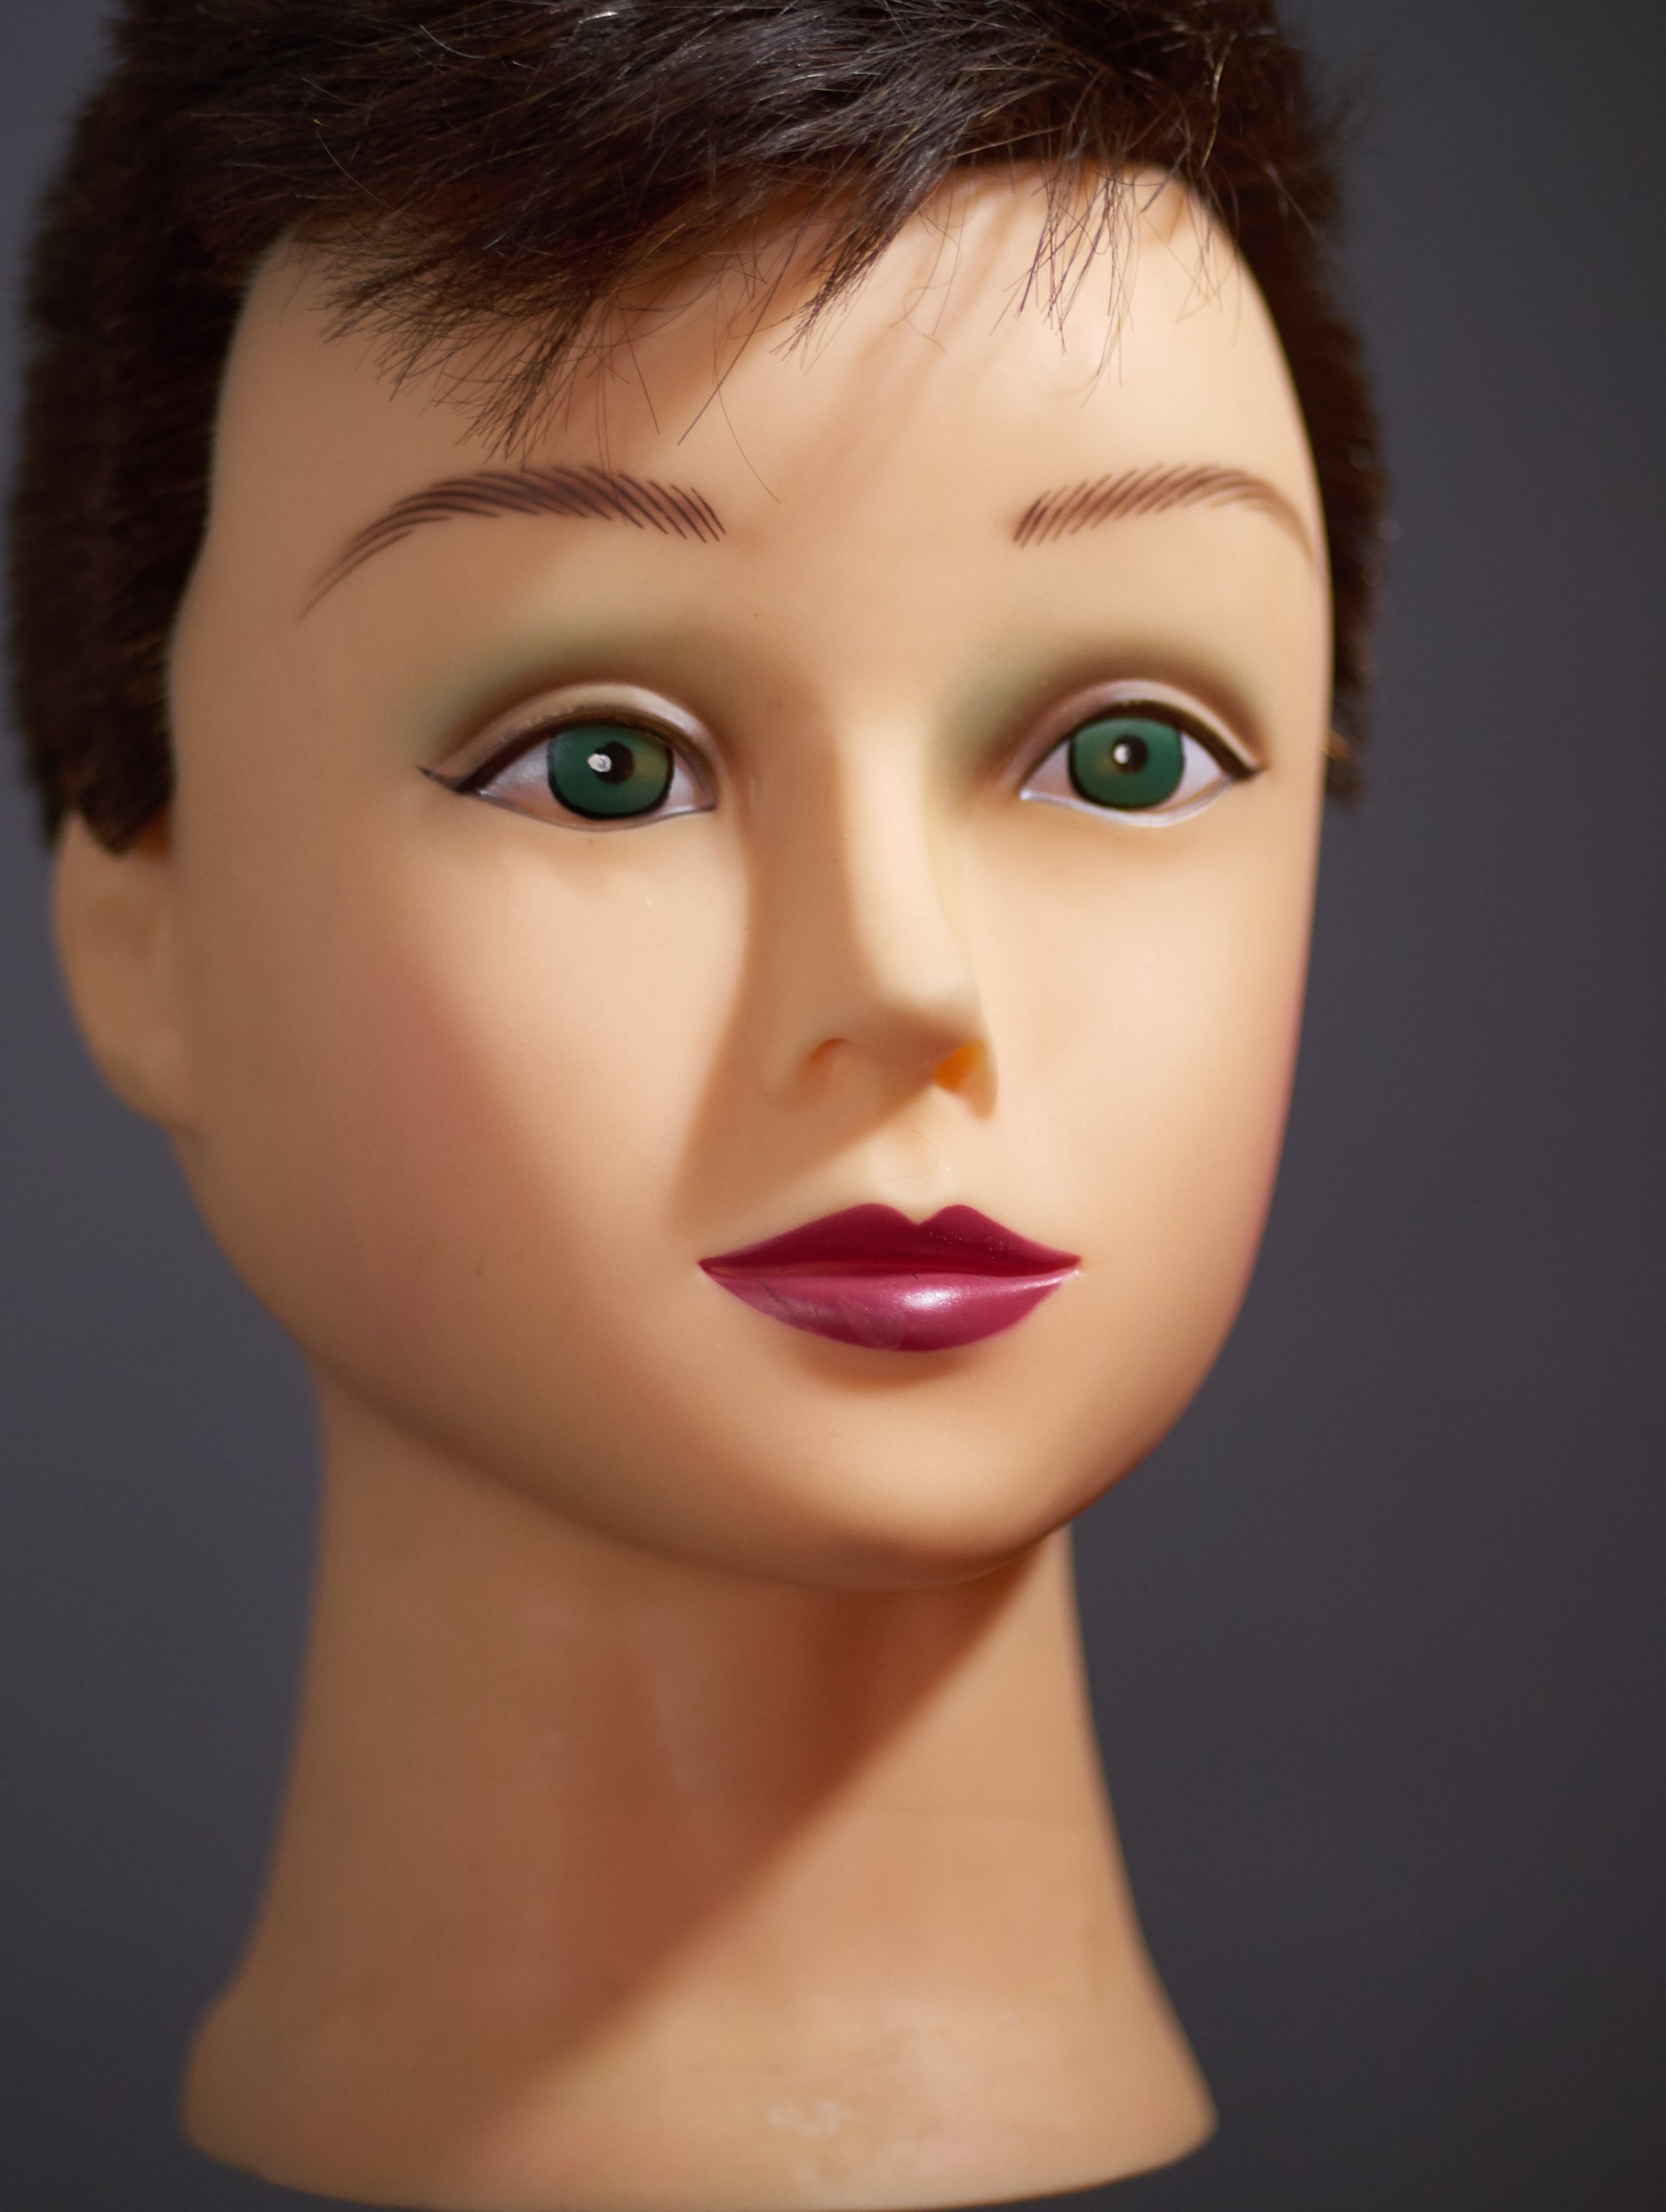 Lume Cube for Macro/Close-up PhotographyThe Lume Cube produces a really hard light as it is a very small light, but also a very powerful one. The Lume Cubes were about 1.5 inches from the subject. Exposure triad: F/4, 1/800 sec., ISO 640. The lens was a 30mm macro with an extension tube. Camera: Panasonic Lumix GX85.The following is the setup:
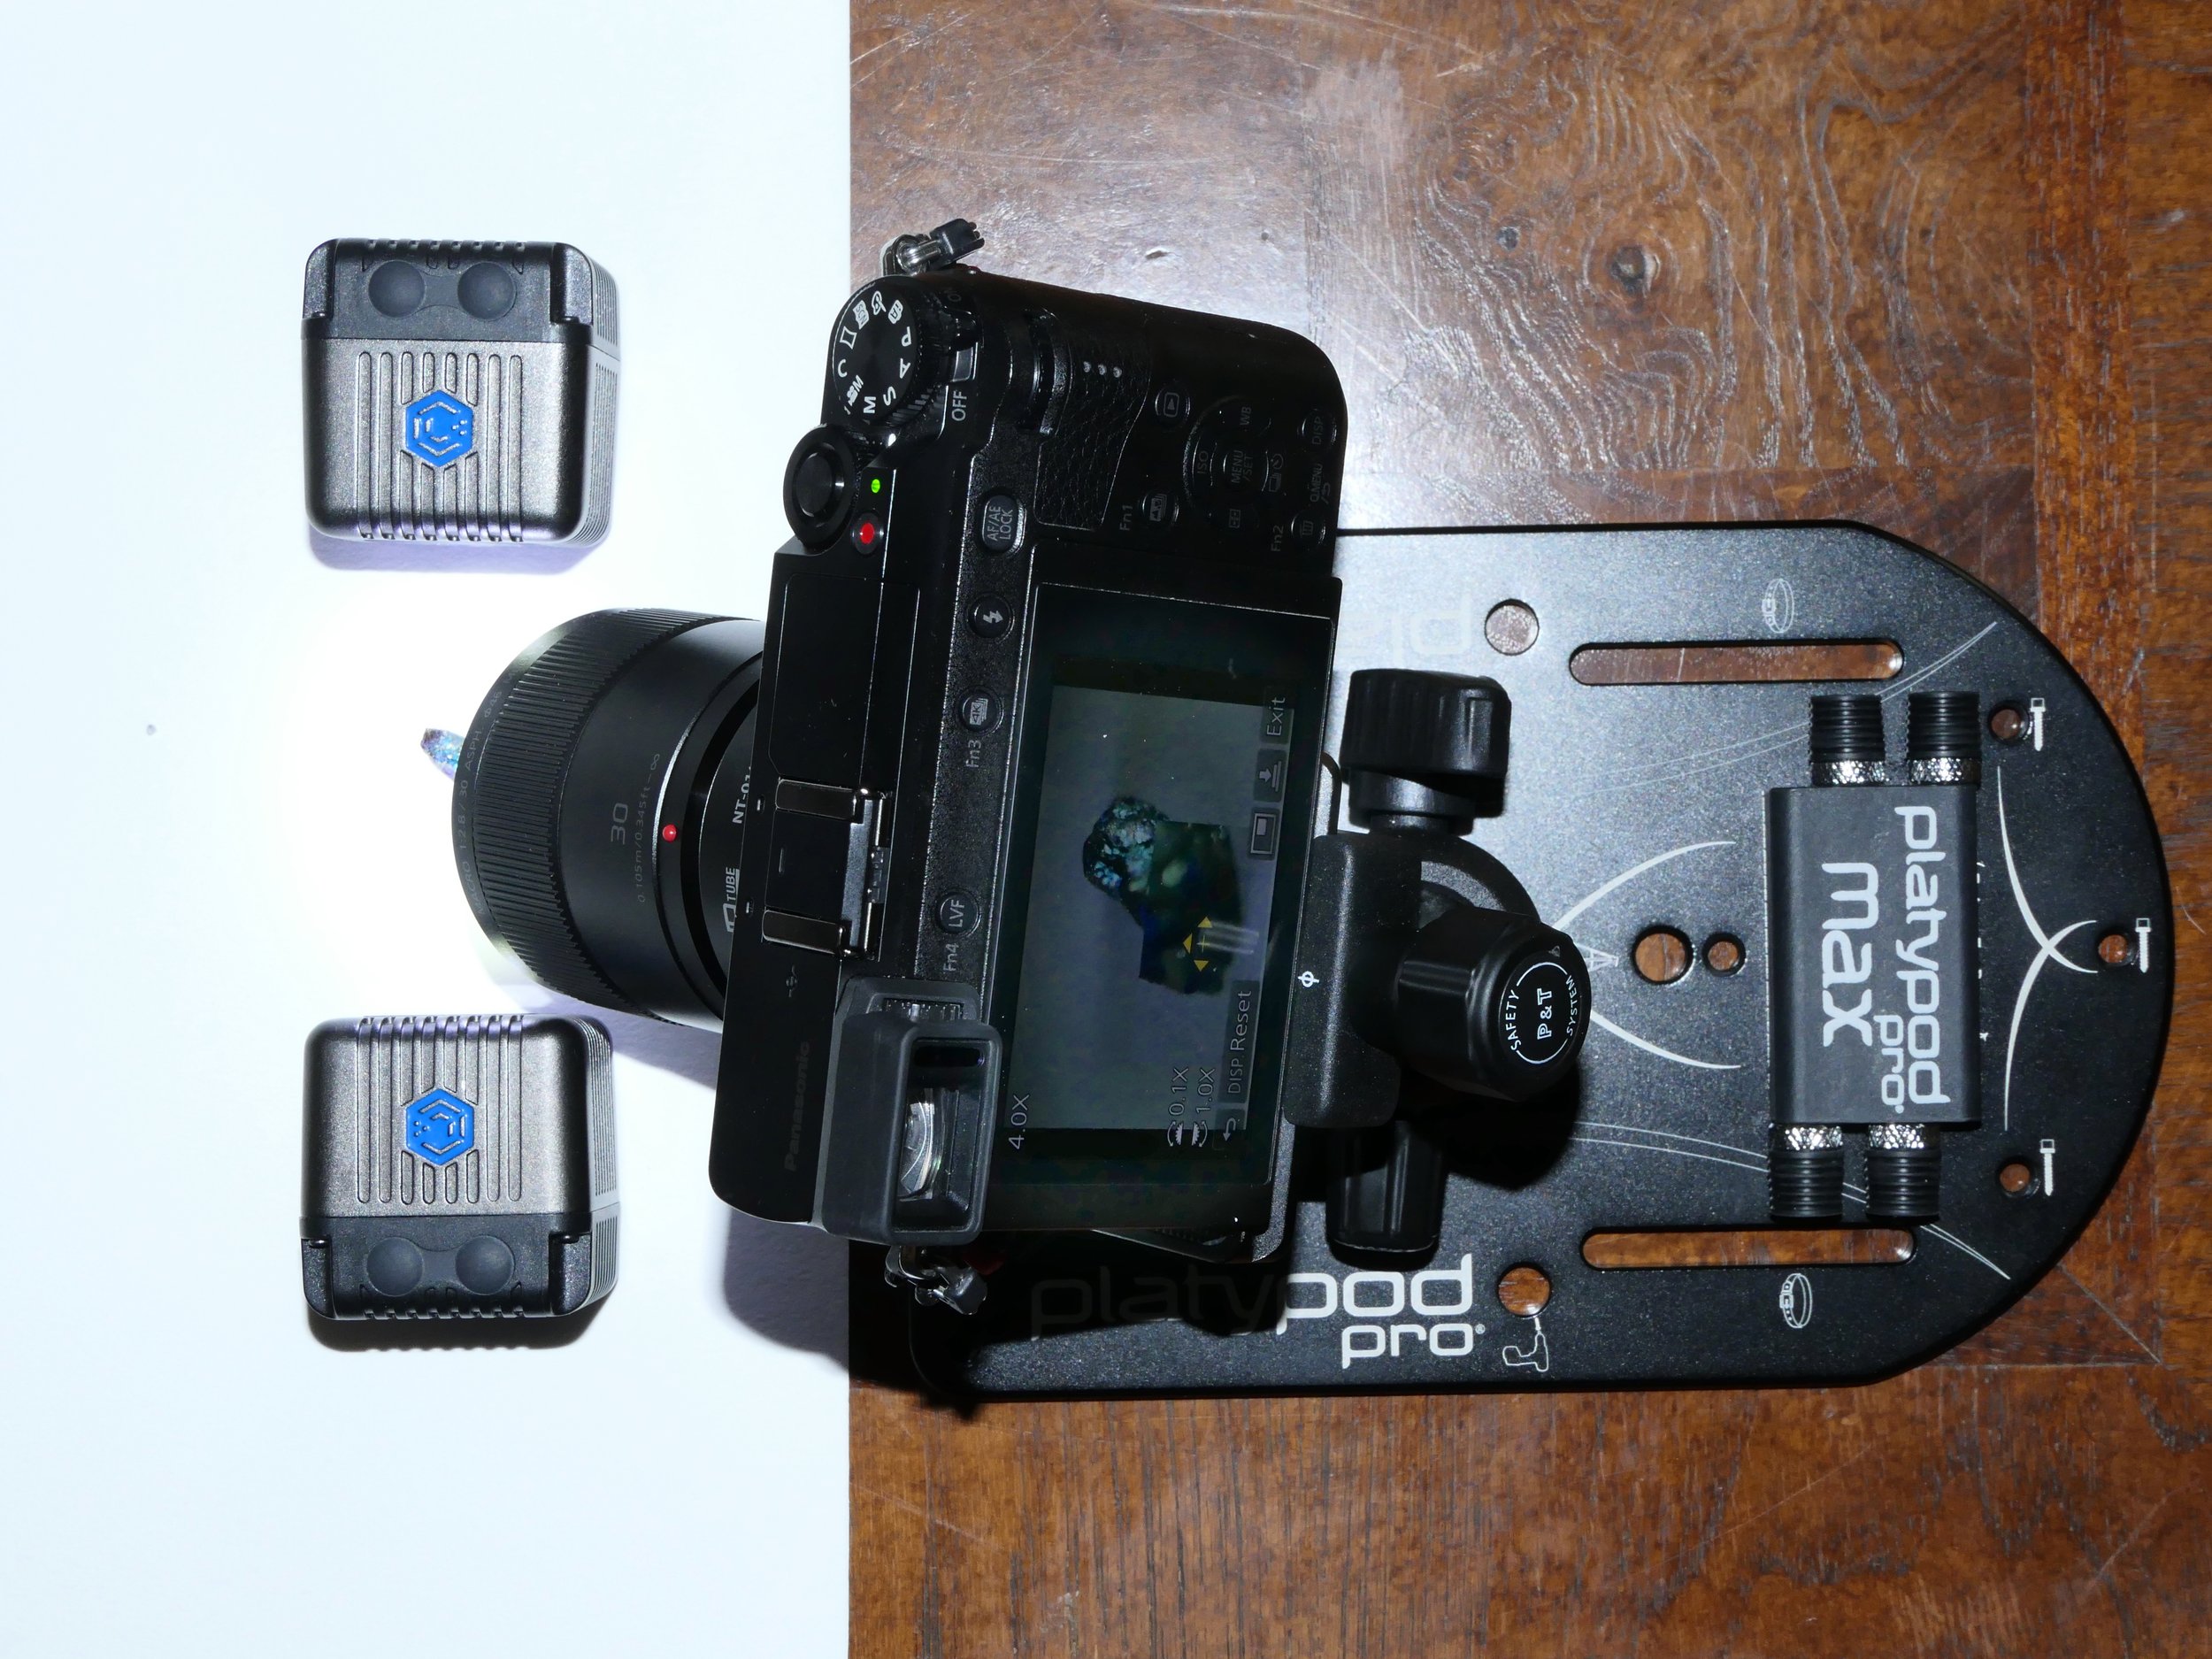 The image shown below is a 45 image stack using the GX85's focus bracketing feature.
 The portability of these little powerhouses has me convinced, and I tend to carry two in my bag at all times.CLICK HERE TO ORDER
One Day Workshop Schedule
ALL ONE DAY WORKSHOPS ARE TEMPORARILY SUSPENDED
Workshop details are available from the Registration Page.
Macro and Close-up Photography
Flash Photography, High Speed flash, creative lighting
Portrait and Lighting Techniques
Digital Photography A-Z. This is a one day three part course that will teach you camera basics, post processing and printing.
The Digital Darkroom - a course that covers image capture, asset management, processing and enhancement, output to print and web media. A one day program for digital image making workflow
Timelapse Photography, post processing and video assembly
If you have any questions or would like more information please call 617-759-0010 or email sv@shivverma.com
Please use this REGISTRATION link to register for these workshops.
Testing Affinity from Serif
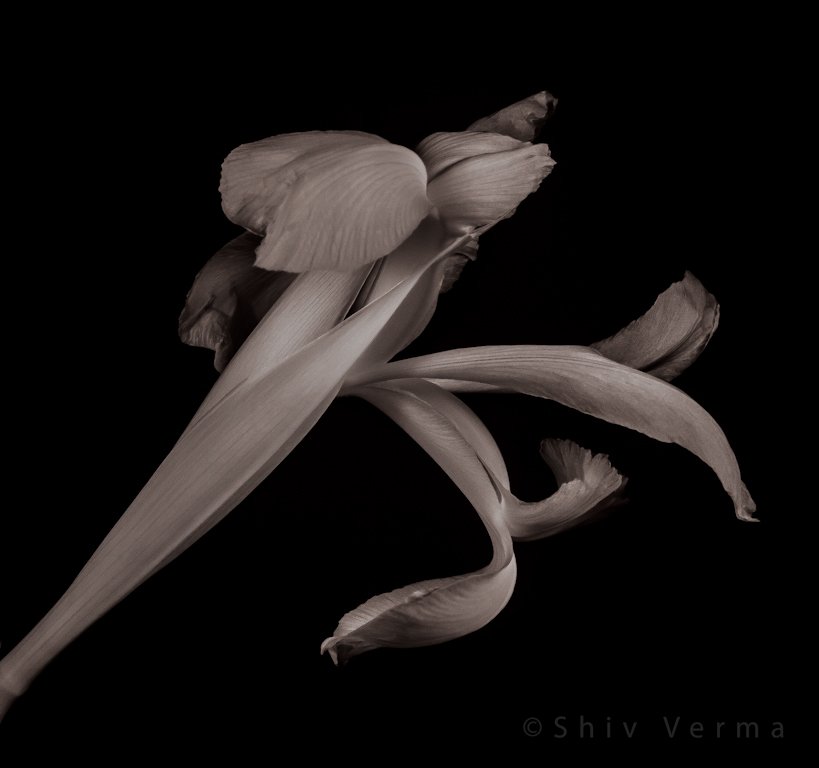
Have not had a lot time to test the 2nd Beta release of Affinity but gave it a good shot yesterday. Still a lot to learn, but on the whole, I like it a lot. Has some great features built in, the filters are great but not sure I like the fact that it creates an intermediate file. The following is an image processed entirely using Affinity (Sony Raw to a TIFF export).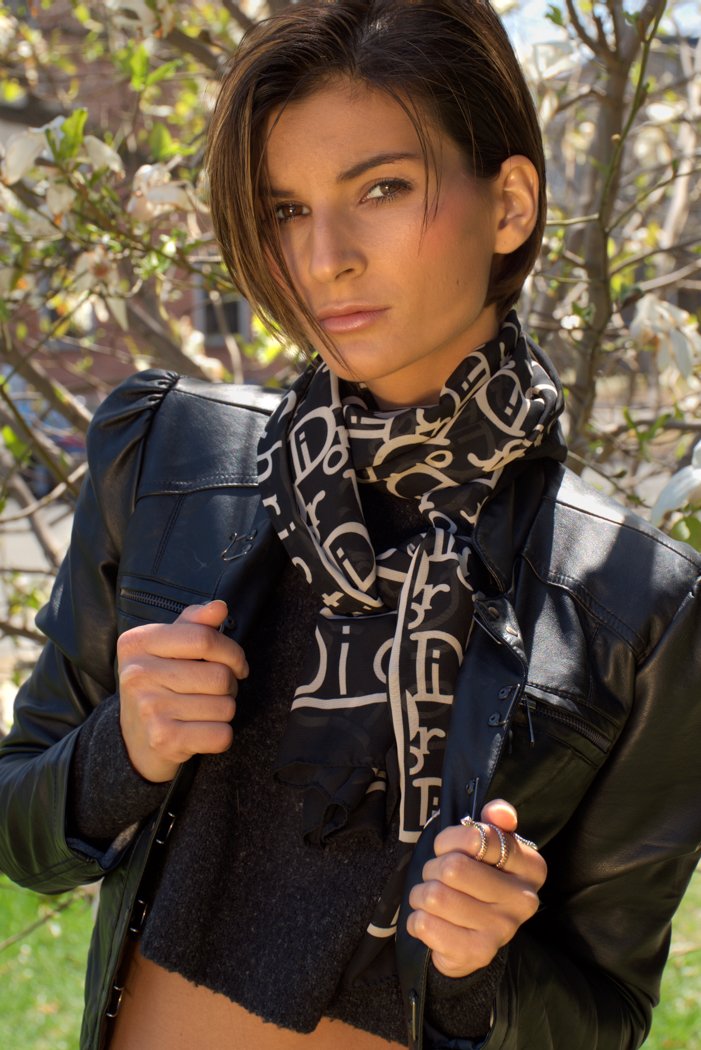
70 South Gallery - Lighting Workshop
 The 70 South Gallery - Lighting and Model Photography workshop was a huge success. Thanks to some great organization by "Adventures in Photography" (NJ, NY and New England) and the 70 South Gallery, Morristown, NJ. The workshop was sold out and we were fortunate to have decent weather for some of the outdoor shoots. I would like to thank the participants, the models and the organizers for all the hard work and support that made this so awesome.Studio lights were Profoto and Arri, outdoor speed lights were Nissin and personal on and off camera flashes. Lastolite reflectors and the Phottix Luna but dish were also incorporated in the various sessions.
2015 First Quarter - One Day Workshops
 Wishing you and your families a Very Happy & Prosperous New YearThe One Day Workshops for the first quarter of 2015 have been posted.They are listed on the One Day Workshop PageORYou may go directly to the Registration Page to get details and register.All one day workshops include a Pizza Lunch
Elinchrome D-LiTE-RX4 - Review
 Elinchrom’s new D-Lite-RX 2/4 200/400 ws strobes are excellent low sync speed semi portable studio worthy strobes. The ”it” designation is for Intelligent Triggering.
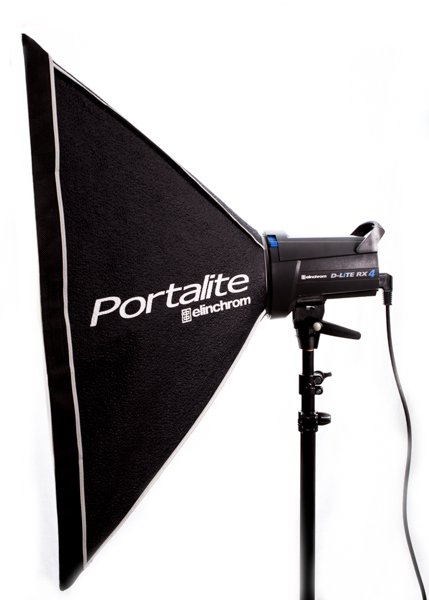
Each strobe head is made from a rugged impact resistant plastic that has a rubberized top handle with a holder for a spare fuse.with many new exciting features. The kit contains two strobes, power cables, two Portalite square soft boxes, with bayonet mounts. Included is one reflector.
Each head has a built-in Skyport” receiver and a four channel Skyport transmitter is included with the kit.The transmitter is an optional item for single units. All heads are fan cooled when needed. The kit includes a pair of Manfrotto light stands and all carrying cases.
The heads are available in 200 and 400 Watt versions. My units are 400 Watts. The control panel is well configured as shown in the image below.
Specifications:
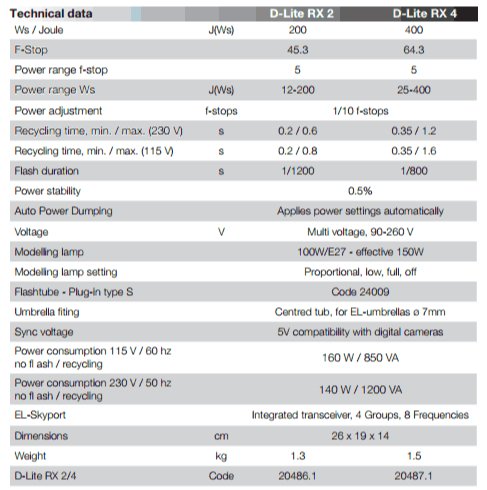
The power switch is illuminated when the head is powered on. A two position LED indicates the power setting, with two buttons to increase or decrease the power in 1/10 increments. Another button allows you to set the modeling light at full power, minimum power, proportional power or off. There is a strobe trigger button called the Eye-Cell and is programmable for Auto, Manual or Pre-Flash modes. This is very useful when using a hot-shoe flash to trigger the D-Lites. Finally there is a button to turn on or off the audible beep. The units have a decent recycling rate recharging in .35 to 1.6 seconds based on the power output setting. A great feature is "Auto Dumping". When you lower the power output the nut will automatically dump the excess charge and indicates it is ready with a beep.
Set-up

Assembling the Portalite soft boxes takes up most of the time. There is one addition I would like, a secondary diffusion panel inside the Portalite Softbox. The rest is easy. The units come preconfigured to work with the Skyport set on the Frequency Channel 1 and Group 1. Changing channels and groups is easy and accomplished pressing the power up and down buttons together, then toggling the function using the modeling lamp mode button and using the individual power up or down buttons to
select the following:
- Groups 1 through 4
- Channels 1 through 8
At any time you can do a Master Reset to factory defaults switching off the unit, holding the power up and down buttons and switching on the unit again.
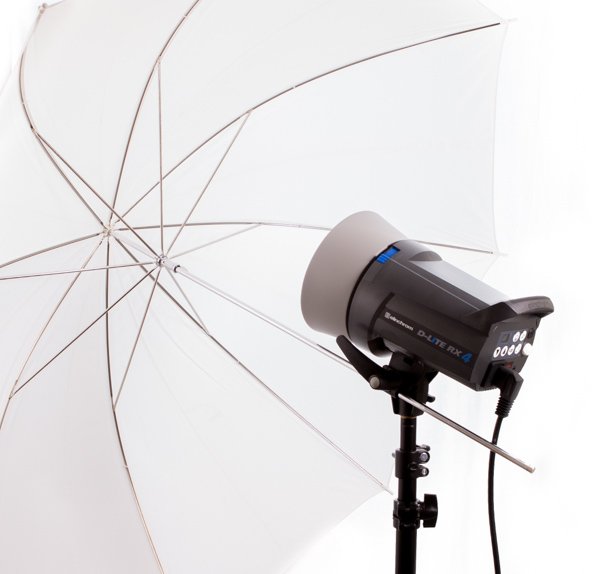 The unit has two umbrella mounts. one is a centered tube that will accept 7mm diameter umbrella shafts that are on the Elinchrome EL umbrellas. If you do not have EL umbrellas you can mount an off centered umbrella in the secondary mount near the tilt handle.
For most of the work I do in studio I find these to be an excellent choice. The units work flawlessly. I have two sets in my studio and for the past 8 months these have never missed a beat. The power output and color temperature are consistent and the supplied cases are ideal for transportation to allocation shoots.
I highly recommend these units to anyone looking for an excellent high quality starter system. My preference is for the 400W units.
These can be purchased for $949 for the 400WS heads and $849 for the 200WS heads. Individual heads are also available but the best price breaks are when you purchase a kit.
Metering Modes and How Your Camera Meter Works
My latest article has been published in Digital Photography School. Non DPS subscribers may read it using the link below. There are lots of excellent articles and product reviews available in DPS and they are all free.Click Here for the article
2014 - 1st Quarter One-Day Workshops
Here is the schedule for the first Quarter of 2014. Please use this REGISTRATION link for details about each workshop and to register.REMEMBER ALL ONE-DAY WORKSHOPS INCLUDE A PIZZA LUNCHJanuary 11 - Product Photography and Lighting TechniquesJanuary 12 – Food Photography and Lighting TechniquesJanuary 18 – Lighting for PortraitureJanuary 19 – Timelapse Photography, post processing and video assemblyJanuary 25 - Macro CloseupJanuary 26 – The Digital Darkroom – a course that covers capture to process and enhancement to output to print and web media. A one day program for digital image making workflowFebruary 1 – Flower Photography, Textures, Blending and moreFebruary 2 – Lightroom 5February 8 – HDR – done right using Photoshop, Photomatics, NiK HDR Efex 2, EnfuseFebruary 9 - Macro CloseupFebruary 22 – Timelapse Photography, post processing and video assemblyFebruary 23 - Photography Basics 1 day Class March 1 – Flash PhotographyMarch 2 – Lightroom 5If you have any questions or would like more information please call 617-759-0010 or email sv @ shivverma.com (please remove the spaces)
One Day Workshop Schedule for December 2013
Here is the schedule for the remainder of 2013. Please use this REGISTRATION link to register and pay for these workshops. Please also fill out and mail or bring with you the Workshop Registration and Waiver Form This is an electronic form, you may print it and then fill it out or fill it out directly and then print the required copies.Click on the links for detailed PDF documents.December 7, 2013 - Photography Basics a one day class December 8, 2013 - Time-Lapse WorkshopDecember 21, 2013 - Lighting WorkshopDecember 22, 2013 - Macro and Closeup PhotographyIf you have any questions or would like more information please call 617-759-0010 or email sv@shivverma.com
Lighting Demo and Educational Program
I am truly honored and proud to have been selected to demonstrate and teach lighting for Manfrotto. They represent Gitzo, Elinchrome, Lastolight, Gossen and more of the finest.Join me for a day at Hunts Melrose or a 1/2 day in Hanover.This is a great educational experience as well as an opportunity to check out some fantastic lighting gear. Some of the finest manufacturers products featured in one location.The event is free but you need to register.

On Location Photography
On location photography, particularly for people and pets needs to be carefully planned and thought out. Where you shoot is the key to how you shoot and what you will need to create the best image. Your colors, lights, backgrounds, hair styles, clothing and makeup will be based on the location you pick. Sure – you can take the easy way out – shoot in the studio. That would be so convenient and you could do your photography blindfolded. By the same token, don’t take your client to your downtown gazebo just because its there. Sure it is convenient, but ask yourself, does the location suit the subject, do the colors work, does the mood work and most important will you capture an image that will stir some emotion in the viewer. The gazebo is a nice place, but is it the best place – usually not.A well thought out location is one that will represent your client’s personality, their activities, their hobbies and pastimes. It would not be appropriate to photograph a musician at a horse race track, nor would you photograph a jockey in his silks in a concert hall. You get the point…….. Every human has a personality it is this personality that identifies this individual and you, as a photographer must capture the essence of this in your photograph. The place you identify as the stage for your image must not only compliment the personality but emphasize it. Remember that every subject is a unique individual, with their own personality.A successful portrait mandates your taking time to getting to know your subject, be it a person or a pet. Ascertain what their likes and dislikes are, their favorite colors, locations, activities, etc. In a short period of time you must get to know them.Portraying the individual and their personality becomes easier if the surroundings compliment the subject. It is amazing how quickly a person will relax when they are put in a familiar place or a place that is representative of their preference. A comfortable and relaxed subject will provide you the opportunity to capture the personality not just a portrait.Once you have spent some time getting to know your subject you can scout out a suitable location. Look for areas that provide diffuse light, keep in ming the time of day when you will be shooting. If it must be an indoor location, try and set it up so as to have soft natural light, in the Northern Hemisphere, South facing windows are ideal. Fill in with artificial light but rely on natural light.Another consideration for location choice that needs consideration is if the place is public or private. Public places can be problematic for a shy subject or if the subject is self-conscious. They may never become totally relaxed – and as a result you may find it nearly impossible to get a truly good portrait. You too may face issues in public places, crowds, curiosity and other disturbances.The last point and probably as important is that your location and its elements must not be or become the dominant features of your image. Remember you sought out the location to photograph your subject not the location. Let the subject shine not the great location you proudly found.
Lighting Demystified - Date Change April 29 to April 28
The April 29 workshop will now be held on April 28thThere are two spots open for April 22nd - Yesterdays workshop was sold out and was awesome.Click Here for Details "Lighting Demystified Workshop"Here are some comments from the post workshop survey:
As an advanced amateur with limited lighting experience, this course gave me a good overview of lighting fundamentals and their application in a variety of challenging situations. In addition, this course will provide me with a good basis for future lighting exploration as I further my photography skill set. Thanks Shiv!
4/16/2012 9:14 AM
I learned a tremendous amount about lighting. Concepts were explained, misconceptions eliminated and techniques to succeed were taught. The best of all was how to do this without spending a ton of money on equipment!
4/15/2012 9:45 PM
The workshop was excellent, I am glad I was made aware of it from a fellow camera club member. I really liked Shiv's teaching style, he got into the technical details of light and made sure everyone understood each concept before he moved on.
4/15/2012 9:06 PM
I just spent a day at Shiv Verma's workshop on understanding Artificial Lighting. I came away from the workshop with a clearer understanding on the importance and the use of artificial lighting as well as the different types of lighting currently available. I highly recommend this program to the serious photographer interested in improving their skill set as well as gaining a better understanding on mastering light. Zig Cape Cod
4/15/2012 8:48 PM
Lighting Demystified
 Announcing three One Day Lighting Workshops April 15, 22, and 29, 2012. Each workshop is limited to 8 participants and is from 9:30 AM to 5:00 PM. Workshops include a Pizza Lunch. Click Here for Details.Information on these and other workshops is available in the Workshops section of this web site.